Open heart surgery on your desktop computer

...or the art of recovering from a bios flashing gone bad.
Picture this scenario: you set about flashing your mainboard bios with an updated version, but something went horribly wrong and now your computer is no more useful than a giant paperweight.
I sincerely wish you will never have any use for the information contained in this article. In the unfortunate event that you do, I hope this information will make your life a little bit easier and help you fix what seems to be an insurmountable problem.
We have all been there... in our hacking spree, we got carried away too far and have somehow managed to screw things up.
This time, it seems that what was done has turned your brand new computer into a very bulky paperweight and the damage is unrecoverable.
When dealing with software hacks, one can always count on being able to revert to the last known good state, thanks to the magic of version control systems or good old reliable backups. But when it comes to bios flashing, there exists a point after which there is no turning back.
This article aims to push the point of no return a good deal further away and allow you to recover from a failed bios flashing procedure.
Let's face it: recovering from a bios flashing gone bad is no easy feat. After a failed bios flashing attempt, the bios chip will contain useless bits of code, the mainboard will not be able to initialize its basic input and output capabilities, and you will be unable to boot into any rescue disk to reflash your bios with a clean image.
Ironically, you need a functioning bios to fix a broken bios, which you do not have.
Fortunately, there is a way out of this chicken and egg problem.
The first and easiest attempt to solve the problem consists in making use of a safety feature programmed by the good folks that developed your bios. Kudos to the bios developers for putting this functionality into their code.
Basically, bios code has a boot block section which is normally not overwritten during a bios flashing procedure. This boot block section contains code that will scan your floppy drive (or cd-rom, usb, network, depending on your bios and mainboard) for a file of a certain name (AMIBOOT.ROM for AMI BIOSes) and will attempt to flash the bios chip with the contents of that file.
This will occur when the boot block determines that the bios checksum is incorrect. You can also force this behaviour by pressing CTL+HOME.
However, this trick will not work if the previous bios flashing attempt corrupted the boot block section. It did not work for me. I tried reading the bios image from different media (floppy, cdrom, and usb key), but with no luck. I did not hear the devices seeking or trying to access the bios image file, so I assumed that the boot block section has been corrupted too.
I needed to find a way to reflash my bios chip. I contemplated buying a PLCC chip programmer, but those things are expensive and I would not have much use for them (I don't expect to have to deal with a bad bios again anytime soon).
So I resolved to try with a make or break approach. The last resort I came up with was to use a separate functioning mainboard to flash my damaged bios chip. Where would I find a spare (and possibly sacrificial) mainboard?
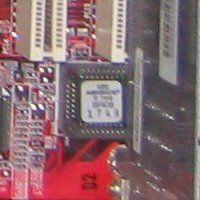
Luckily, my cousin happened to have an old computer lying around which had a motherboard with a PLCC AMI bios chip. Bios chips come in two different sizes: DIPP and PLCC. A mainboard with PLCC bios chip socket was exactly what I was looking for.
These PLCC chips are mounted on a socket and can be removed with the appropriate tool. Or, as it turns out, with a pair of small screwdrivers and a lot of patience.
Here's your step by step open-heart surgery procedure to recover a from broken, badly flashed bios:
- Preparation:
- You will need a bootable DOS floppy disk containing the bios image and the flashing utility program. You can try the excellent FreeDOS project. Alternatively, if you have access to a Windows XP installation, right click on the floppy drive icon in "My Computer", select "Format" and check the "Copy system files" option. I recommend arranging the maiboards on a large, unencumbered desk (beware of electrical shorts) to ease removal and insertion of bios chips and other components.
- Procedure:
-
- boot from the functioning mainboard (mainboard A) - if it supports bios shadowing, enable it so that bios code will be copied into RAM
- while mainboard A is on, gently remove the bios chip using the appropriate tool (or, carefully, with a pair of screwdrivers, paying attention not to damage or crack the socket nor the bios chip)
- remove the corrupt bios chip from the badly flashed mainboard (mainboard B) and insert it into mainboard A
- start up the flashing utility program and proceed to flash the bios as usual
- power off mainboard A
- extract the reflashed bios chip and plug it back into mainboard B
- reinsert the original bios chip into rescuing mainboard A
That's it!
Your badly flashed mainboard and rescue mainboard should now be back to perfect working condition.
- Matteo Vescovi's blog
- Login to post comments